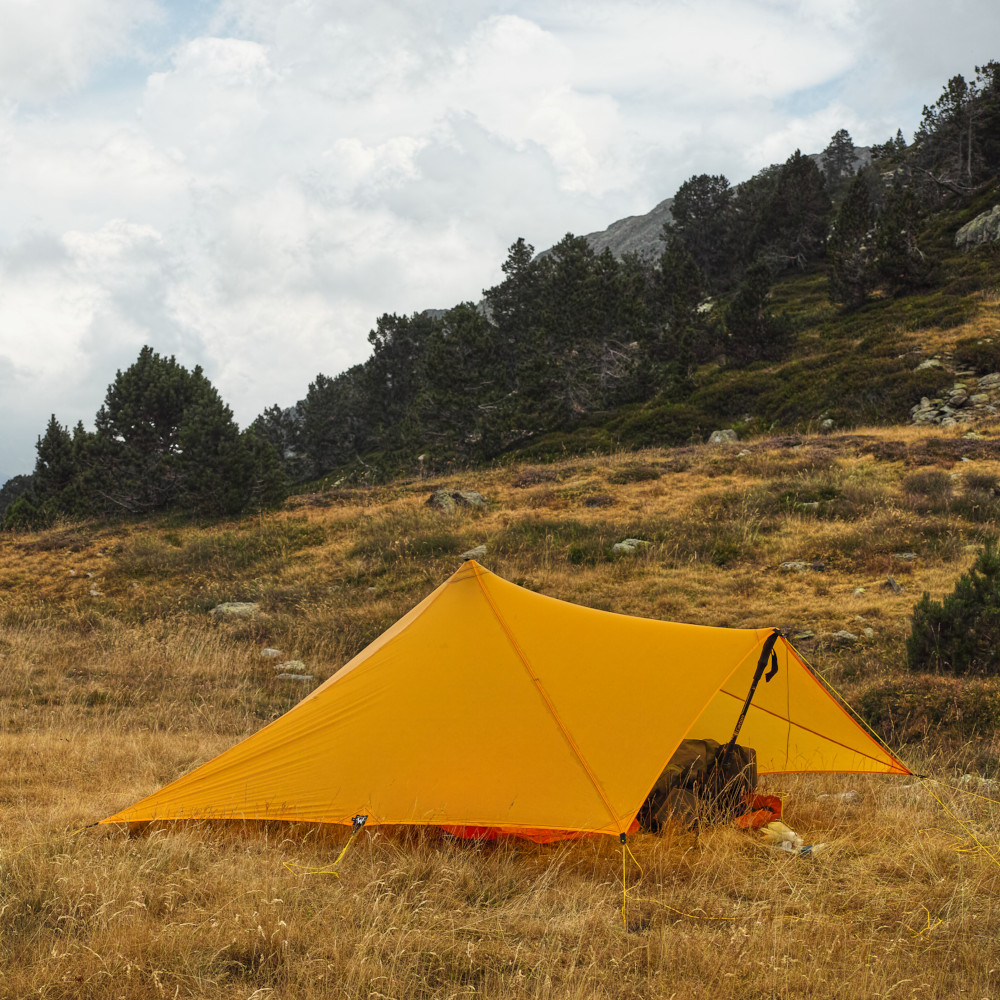
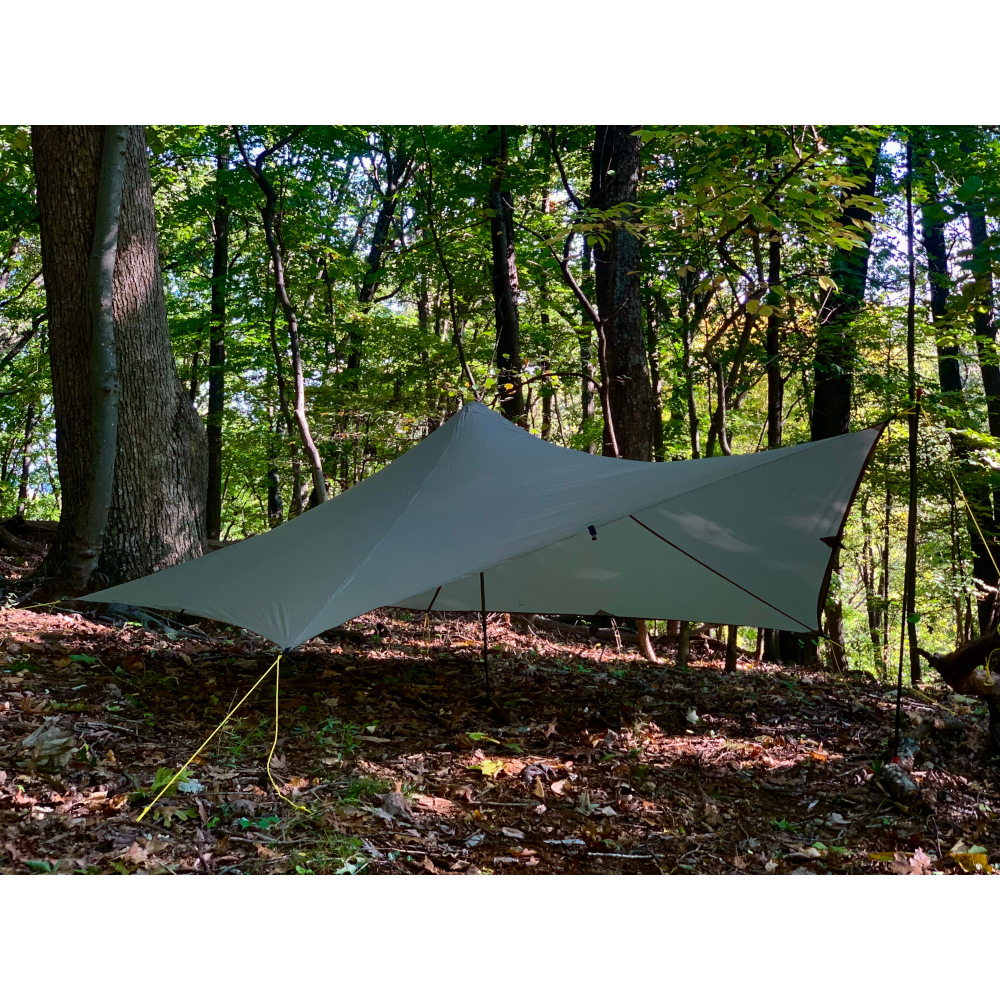
THE TRAILSTAR, BUT SMALLER AND LIGHTER WEIGHT:
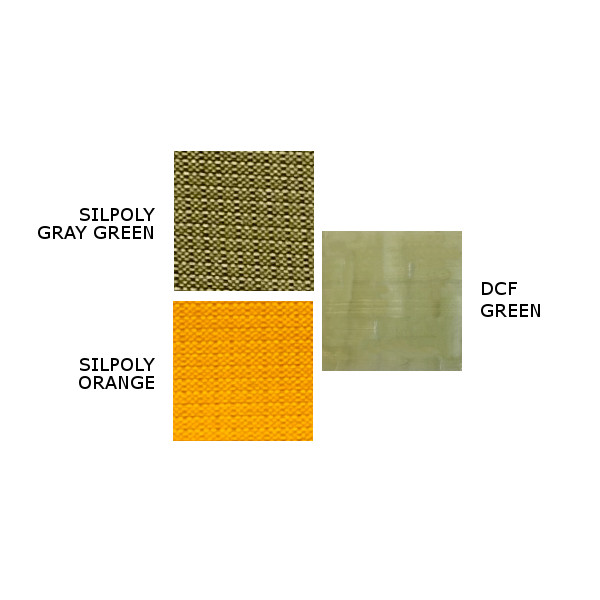
SilPoly 13.8oz | 391gm
.75 DCF 9.8oz | 279gm
.5 DCF 7.2oz | 204gm
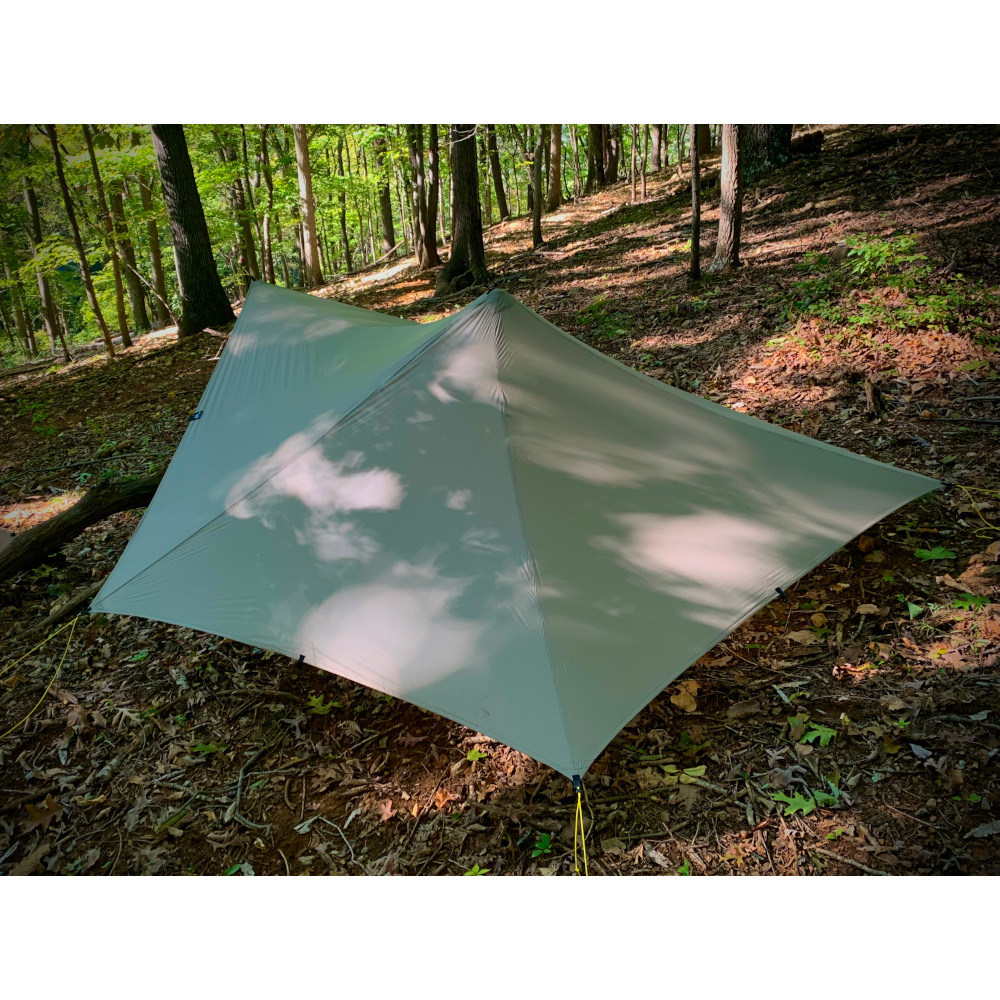
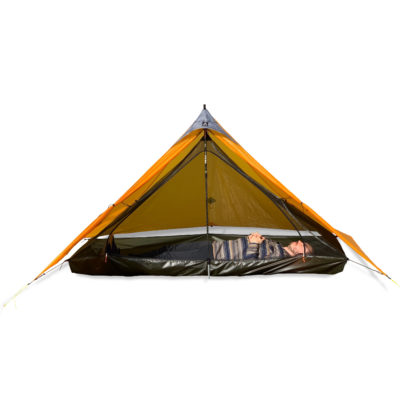
The LittleStar is the smaller sister of the award winning TrailStar combines the high performance of a traditional pyramid shelter with the open multi-function pitching options of a tarp. This original shaped tarp has five equal low-angle sides, no doors, and no zippers, flaps or vents to wear out or fail you when you need them most.
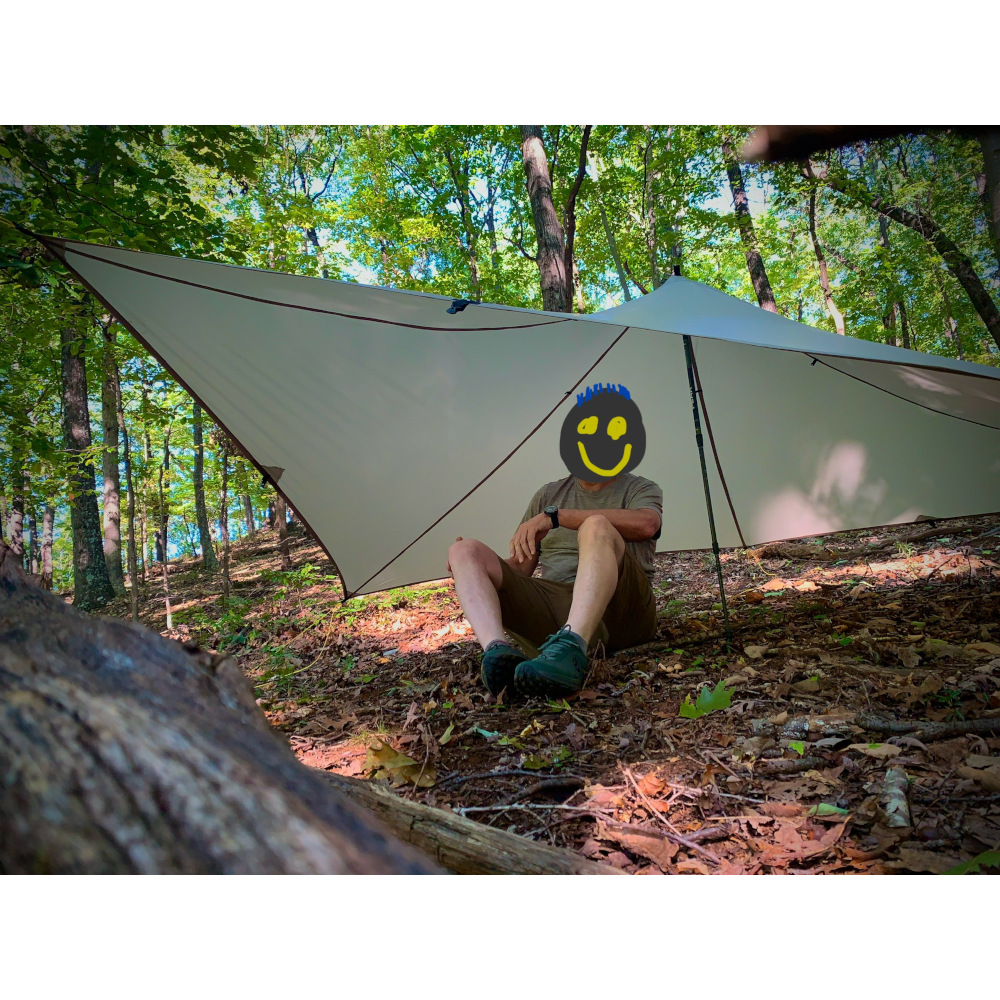
The LittleStar comfortably sleeps 1 – 2 people but can accommodate 3 in a pinch! This tarp can also be set up as a shelter for day hikers and ski groups for lunch stops and emergencies.
Five equal size panels blend shelter protection with tarp pitching ease and multiple shape options. One or two sides of the LittleStar can be staked tight to the ground while the other sides are set higher using longer guylines to make it a wedge shape. This allows you to block the wind from one or more directions while still getting great views from the others. For really harsh wind, all ten stake points can be used for an incredibly stable, low, wind shedding and bombproof shelter.
TrailStar VS LittleStar
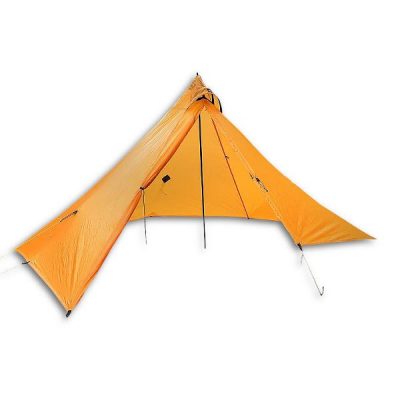
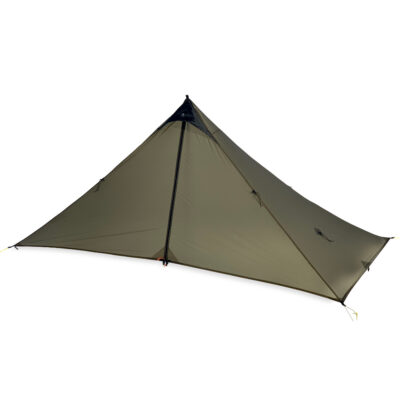
For average height and short hikers the LittleStar is plenty large enough. It saves a bit or weight and packs smaller. If you are UL and do not use a long+wide sleep pad and are not over about 6′ the the LittleStar is for you. For 2 people both should be using regular lenght pads. The LittleStar is most commonly pitched with one of the 5 main corners up in the higher “Tarp Mode” (sage green pictures) but can also be pitched in the low storm tent mode (orange pictures) but with a bit tigher space if two people. If you expect to wait out prolonged heavy rain then the larger TrailStar may be the more comfortable choice.
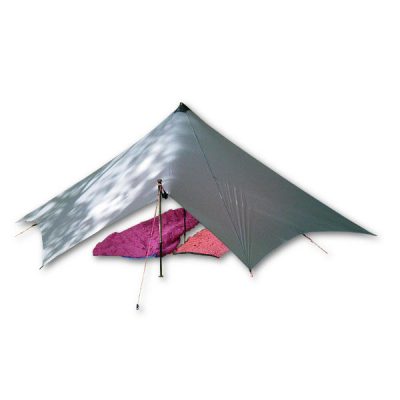
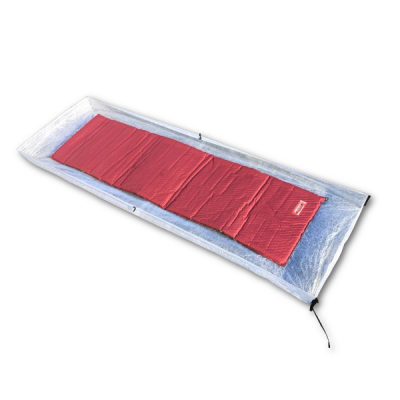
NOTE: No InnerNet or dedicated Floor is availble for the LittleStar. The Superlight Bivy works great with this tarp shelter.
FEATURES
• Fast Setup – No Doors, Zippers or Moving Parts
• 20D Pro RipStop High Tenacity SilPoly fabric for strength and low stretch.
• BOMBER alpine wind protection when compared with a tarp.
• Five equal size panels blend shelter protection with tarp pitching ease and multiple shape options
• The 6.5′ | 2m long baseline on each of the five equal sides create a large pentagon shaped floor plan living space.
• Pitches with one standard or short length adjustable trekking pole in the center and one for the front entrance.
• 55+ sq/ft | 5.5+ sq/m of usable floor space
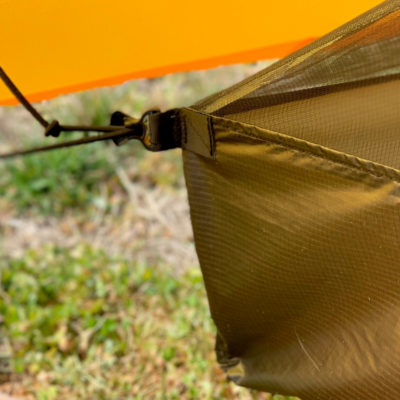
• 10 perimeter tie-outs, all with LineLocks. One at each primary corner and one centered on each side at the edge. Linelocks can be removed to save 1oz”
• Awesome shelter for 1 hiker with a dog.
• Roof angle is moderate for great wind shedding and light snow loads.
• Overhead gear hang loops mid position on each of the five seams to rig hang lines or clips up bivy hoods.
• Roof Apex is reinforced and has an outside guyline loop and inside has a gear hang loop
The SilPoly version of this shelter requires seam sealing, which is why we include seam sealer with all our SilPoly and SilNylon shelters. You can seam seal this shelter yourself in about 30 minutes with the supplied seam sealer OR as an extra service we can do it for you! Watch a how to video HERE.
We use a diluted 100% Silicone Sealer on the exterior stitching above the lower hem. Factory seam sealing can add about 1 week to the order process. Seam sealing adds about 1 oz | 30 gm +/- depending on the shelter size.
Factory sealed shelters are returnable under the regular return policy, where as DYI seam sealing is not.
We STRONGLY suggest you pitch the shelter and test before a trip. Set up before a good rain or spray with a garden hose nozzle arching up in the air and down on the shelter simulating rain for at least 15min. Touch up or resealing may be needed eventually.
NOTE: DCF (Dyneema® Composite Fabric A.K.A. Cuben Fiber) shelters do not need seam sealing.
STAKES
COST: $30
Add THREE Titanium Skewer Stakes and SIX Easton Aluminium Stakes to your purchase.
MLD 2.7 MM PRO REFLECTO GUYLINE
COST: $6 WEIGHT: 2.9 oz | 82 gm
This product includes 40′ of our regular, non-reflective Pro Guyline in your choice of Yellow or OD Green. You can upgrade this to 40′ of 2.7 MM Reflecto Pro Guyline which has properly spaced reflective markers that are bright enough to see, without making your shelter look like that obnoxious house on your block with the out-of-control Christmas lights.
Q: WHAT SIZED POLES FIT THE LITTLESTAR? A: Two adjustable trek poles are best. Fixed 45″ poles would be just about perfect for the most common pitch. A very high pitch could use a 48″ center pole and a very low storm pitch could use a 42″ center pole. Found sticks works great too.
NOTE: Two of our 45″ tarp poles work well and are low cost.
Q: WHICH FABRIC TYPE SHOULD I GET? DCF OR SiLPoly? A: The main decision is cost vs. weight. The functional differences will not be very significant for 90% of users 90% of the time, but here they are:
STRENGTH: The DCF (Dyneema® Composite Fabric A.K.A. Cuben Fiber) version is stronger than the Silnylon version because the .75 oz DCF is 6X stronger than SilNylon fabric and the tie-outs pull test to higher strengths. We bond and then additionally over-bond the seams. We reinforce and then double bartack through 6 or more layers of the DCF or Silnylon at main corners. The Pro SilPoly version is very strong and has been well tested all over the world and has never failed in the field. Both are strong enough for a very wide range of environments, and this question should not be a prime consideration for selection.
WEIGHT: The DCF Version is lighter but costs more.
SNOW: SilNylon is very slippery, and snow will slide off a little better than with DCF. If using the DCF version in light to medium snow, you may need to shake it off about 20% more often. Frequent winter users that expect more snow will prefer the Pro SilNylon version and will want to pitch it with steeper walls. However- neither version is intended as a full-on winter snow shelter- We make DuoMids and SuperMids for that!
SUMMARY: If you prefer a slightly quicker learning curve, and sometimes easier pitching and/or a bit wider range of configurations and/or you will experience more snow on frequent trips then the SilNylon version might be better for you.
If you are after something ultra light and ultra strong, you are probably after the DCF version.
Either way, we highly encourage users to test pitch either version in nice weather in their yard a few times to discover the many pitch options and gain set-up speed. Interestingly, we have had fewer questions about pitching the Trailstar than the regular Pyramids…go figure!
By looking at the pictures above, and watching the video below, you can easily see about how long to cut the guy lines. A foot or two extra is OK for the first set up – you can trim it later if desired.
MIDDLE PITCH (Tent Mode) INSTRUCTIONS
The most common setup for the LittleStar is the “Middle Pitch” – a pitch which uses one of the middle edge tie-outs for the door pole.
1. Loosely lie the shelter out on the ground. Visualize an equal pentagon shape for staking angles.
2. Stake down the five primary corners, visualizing a pentagon shape for guyline angles off the shelter. The two primary corners, next to the center door pole tie-out, should be moved about 1 – 2in | 2.5 – 5cm closer together that the other primary corner stake points: 1in | 2.5cm for a lower door, 2in | 5cm for a higher door.
3. Insert trekking pole in the center at about 42in | 110 cm high.
4. Add the door pole at about 40in |100cm – set the height to whatever is tight, depending on the width of the front corners.
5. Use built in Linelocks to tighten each corner.
DONE, in 1.5 minutes or less!
HIGH PITCH (Tarp Mode) INSTRUCTIONS
The fast setup in the “High Pitch” uses the five primary corners with one pole off one of those five primary points.
1. Loosely lie the shelter out on the ground. Visualize an equal pentagon shape for staking angles. (15 sec)
2. Stake down four corners, visualizing a pentagon shape for guyline angles off the shelter; Shorter lines for a low pitch, longer lines for a high pitch. (20sec)
3. Insert trekking pole in the center at about 45 in | 120cm
4. Stake out 5th corner off a stick or 40 in| 100 cm trekking pole. (25 sec)
5. Use built in LineLocks to tighten each corner. (20 sec)
DONE, in 1.5 minutes or less!
GETTING IN
Since the LittleStar is a five-sided shelter, it will stand up with only four of the five main corners staked down.
• If you have your LittleStar all staked out, low to the ground, easily loosen one corner using the LineLock, then duck inside and re-tighten the LineLock by reaching out from the inside. It’s easier than it sounds!
• If you do not need your LittleStar in the full low pitch; use a second trekking pole or stick (about hip height) and pitch one corner off the ground as a door. This creates a nice tall door.
• If you want “in between protection” (a smaller door), you can make a knee-height eyebrow door arch using a second trek pole about 24 in | 61 cm tall on a center side tie-out.
PITCHING VARIATIONS
• One or two sides of the LittleStar can be staked tight to the ground while the other sides are set higher, using longer guylines, to make it a wedge shape. This allows you to block the wind from one or more directions while still getting great views from the others.
• For really harsh wind, all ten stake points can be used for an incredibly stable, low, wind shedding, bombproof shelter. Pitched all the way low it should be able to handle 60 mph winds!
•The LittleStar can be pitched really high using a long stick or two trek poles lashed together and longer guylines. Think: Walk-In Party Cabana!
Each of our SilPoly and SilNylon shelters comes with one tube of McNett Sil-Net Seam Sealer. It is STRONGLY recommended you use this supplied seam sealer to seal and strengthen the seams of your shelter.**DCF (Dyneema® Composite Fabric A.K.A. Cuben Fiber) Shelters do not need seam sealed.**
INSTRUCTIONS
1. Pitch and inspect your shelter for any issues. Once it is seam sealed, it is non-returnable except for significant defects.
2. Use the supplied SilNet Sealer and ONLY the SilNet Sealer. (If you want to dilute it or use some other silicone sealant it should work OK and is common (research this yourself online) but, you are on your own- results may vary and are not covered by warranty! If you go this route, it is assumed you know 100% what you are doing and have done it before!!!)
3. Pitch the shelter tightly. Temperatures should be above 60 F and humidity below 80%. You may do this indoors. You may also do one seam at a time indoors if the seam is stretched slightly. Pinning one seam from each end on the floor between two heavy objects works OK.
4. We use the SilNet straight from the tube. Do not make a big hole in the sealer tube – start small so that you can control flow. Multiple small application is a lot better than one big smear.
5. Main Seams: Place a small bead on the seam along the stitching. Work on a 3’- 4’ section at a time. Use a finger to press the sealer into the stitching and the small valley at the edge of the seam where it is rolled under.
ALLOW AT LEAST 24 HOURS TO FULLY DRY.
NOTE: You only need to seal the OUTSIDE of the shelter. You do not need to seal the bottom perimeter roller edge stitching. It is OK to add a small bead on the leading edge of the triangle tie-outs reinforcement stitching, but it is not required.
SPECIAL AREAS: Add a little sealer to any tie-out stitching on the middle of a panel (Mids, Cricket, and SuperTarps). Seal the zipper storm flap stitching and tie-outs on the Mids. Seal the stitching and apex tie-outs areas on the Mids, Crickets, and TrailStars.
IMPORTANT: Do no go back and forth over the wet seam too much – after a minute or three it will get gummy and look bad; it is better to wait for 8 hrs and then add some over any area you missed.


Reviews
There are no reviews yet.